Adding Modules to Omeka S
This guide describes the process of adding a Module to your Omeka S installation. Note that Omeka also provides instructions on how to do this at https://omeka.org/s/docs/user-manual/modules/#installing-modules, but before you can follow those steps, you’ll need to add (“import”) the module’s files to your server. That is, find the source code files, copy them, get them onto your server, and put them where Omeka will look to find them.
This guide demonstrates the process of adding files to your server
with a combination of tools, namely ssh (a command line interface to your server’s OS)
and FileZilla (a graphical interface that provides secure access and aids the process of moving files between drives, in this case from your local drive to your server.
These instructions might also be called a “how to” demonstration for using SSH and FileZilla. Note that the process for logging in with Filezilla is illustated in the Filezilla login guide. The screenshots in the guide below show steps to install the CSV Import module.
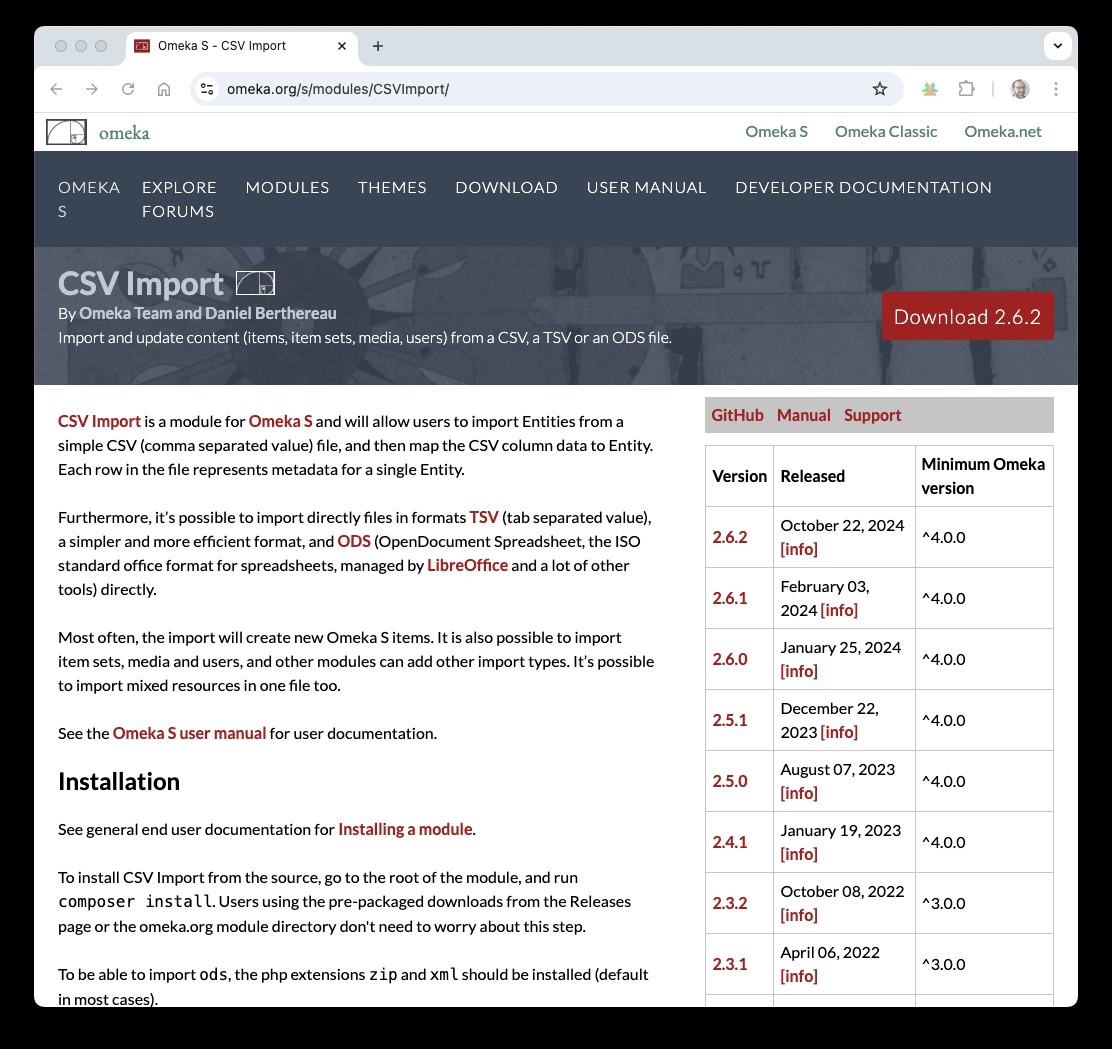
- First, find the files you need in the Omeka S module registry: https://omeka.org/s/modules/. You will find many modules in the registry, and while you are welcome to install any that interest you, there are a few critical modules that will support your digital collection term project, as described in the Omeka S configuration guide.
- Once you find the module you want, click the “Download” button. If there are multiple versions, it is usually best to choose the most recent unless there is some indication that that version is still under testing. The button should download a zip file to your computer.

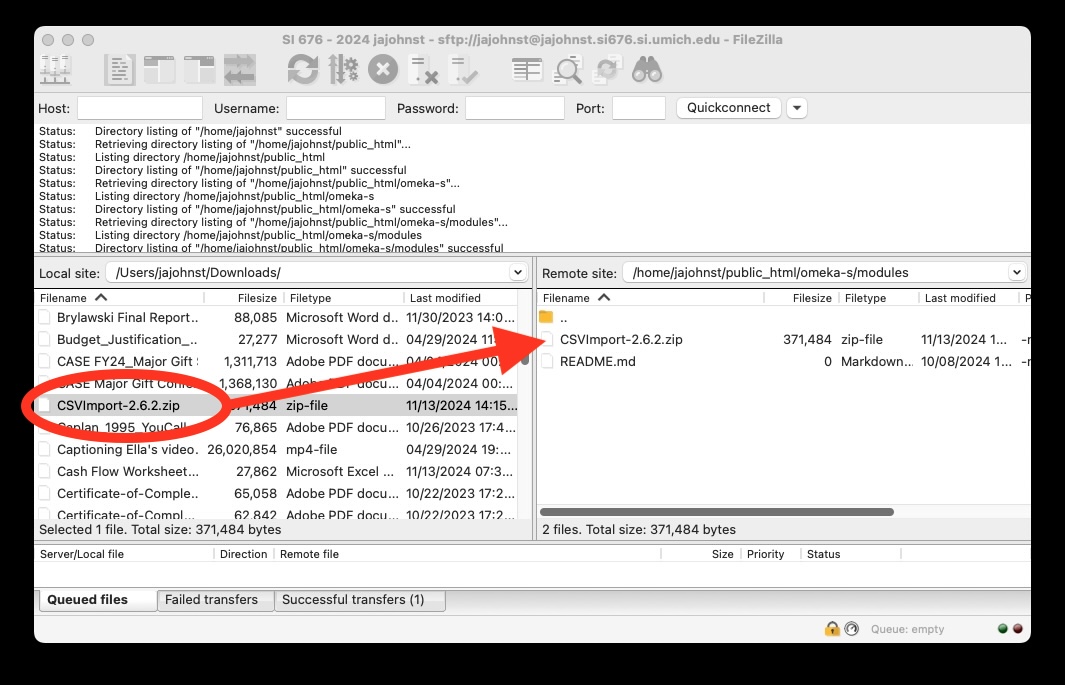
- Now, use FileZilla to move the zip file from your computer to your server.
The zip file should be placed into the
modulesfolder that you will find within the Omeka S folder that you have previously created on your server. (Follow the usual process for working with Filezilla.) To move the files, locate the downloaded zip file in left-hand panel window (showing files on your local computer), then click and drag it to the modules directory on your server in the right-hand panel window (showing files on your server).
- Now that the zip file is on the server, log in to your server via SSH in your terminal or command window. To log in, use the same process to log in to your server with SSH.
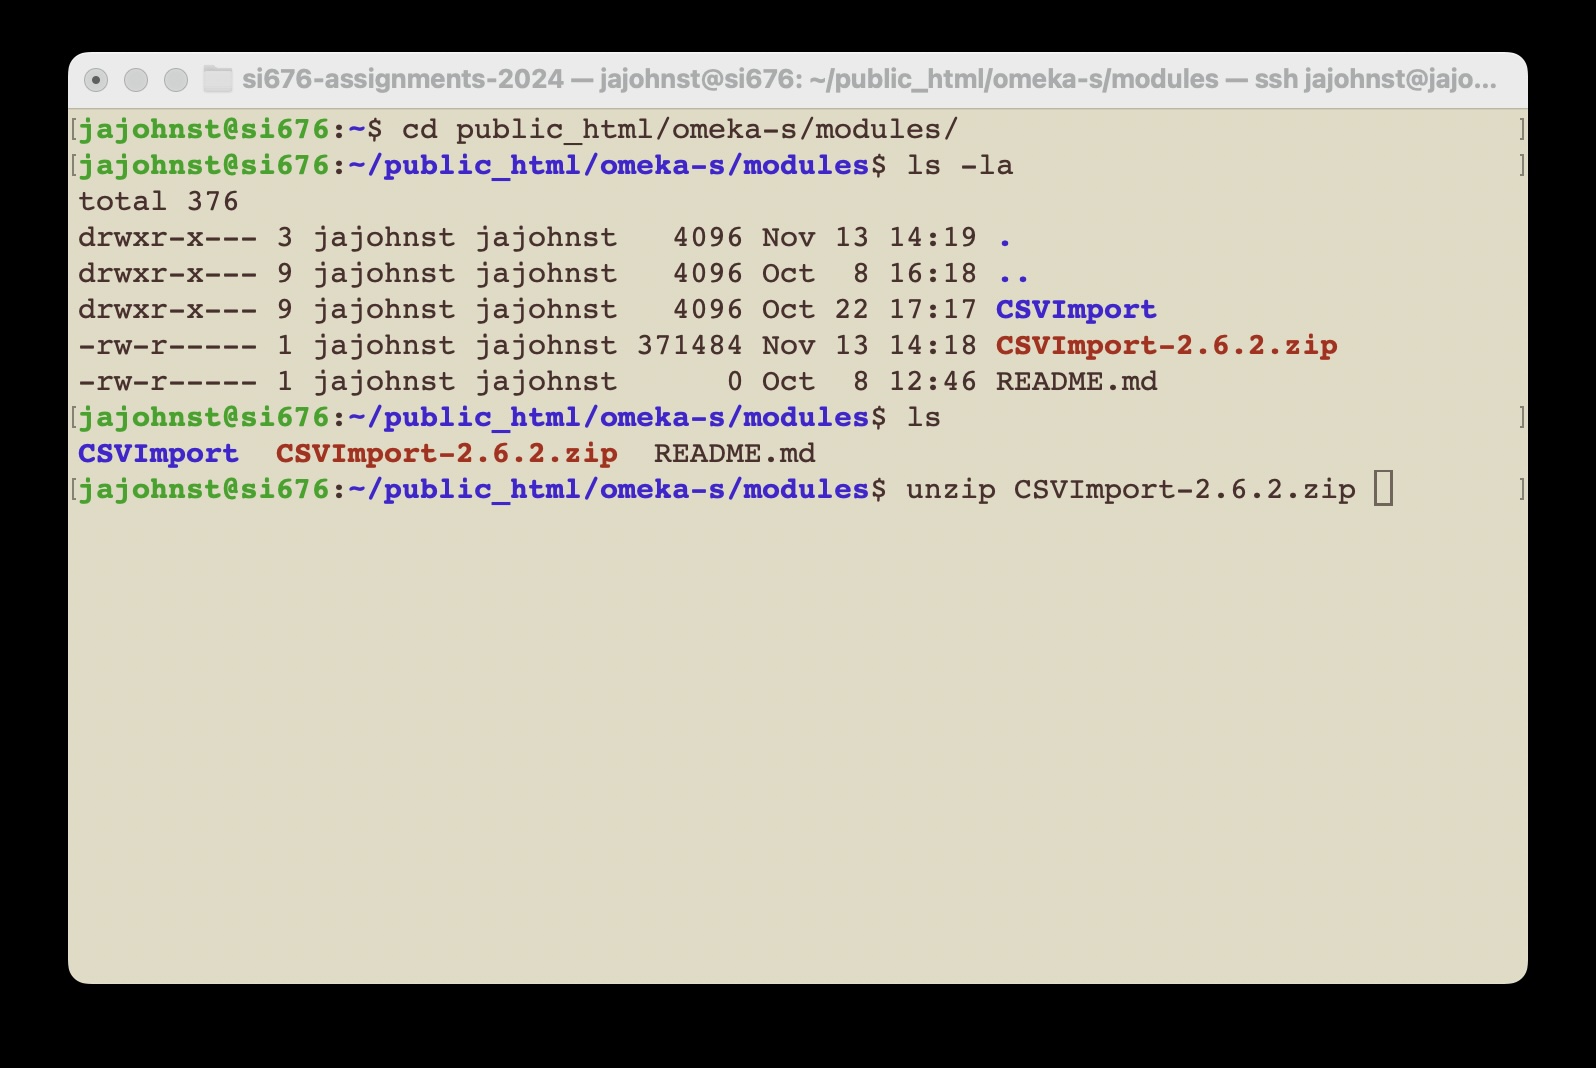
- Finally, you can use the command line to unzip the files.
To do this, move your command prompt to the modules folder (while this command is context-dependent given the location of your window, your command will look something like
cd public_html/omeka-s/modules/).When your prompt is located in the modules folder, check to confirm that the zip file is there (ls -la). Then, unzip command to open up the module (e.g.,unzip CSVImport-2.6.2.zip).
Once the files are moved into Omeka S’s modules folder and unzipped, you can follow the instructions in the Omeka S guide for “Installing Modules”.
Additional modules can be added by following the same steps with any zipped package for an Omeka S module. For Assignment 2b, you need to install these modules:
- CSV Import
- Common
- OAI-PMH Repository
- Numeric Data Types