Omeka S Install Guide
This page describes how to set up Omeka S on your servers.
Installing Omeka S Manually
This is a multi-step process. In case you were wondering, it is unlikely you would have to install the tools in this way (a more likely scenario is that your server has a helper install tool; one common one is called Softaculous). Even so, installing this way helps you to understand the overall architecture of the LAMP server, how the different elements interact (in this step, particularly the file system - LINUX - and databases - MySQL). The Apache server is handling the HTTP requests and tasks that display the cPanel interface, and any of the interactions between the platform components are likely communicating to the databases via PHP. For the most part, though, you don’t need to worry about how those components interact once this installation step is completed.
The manual install process has a few main steps:
- Get the server ready.
- Set up a place the program can “live” in the file structure.
- Set up a database and database user agents.
- Get the files for the application ready:
- Download the Omeka S files (in .ZIP) from the Omeka server at https://omeka.org/s/download/.
- Unzip the files locally and prep them (this is mostly the addition of your database user information).
- Put the files on the server. This is mostly transferring the Omeka S program files to your server.
- Configure the web application. This is relatively basic and involves creating an initial login for the Omeka S platform (explained below).
The process explained in detail below is also outlined in the Omeka S User Manual, but the details of the steps are not described. Here are those steps described as they should be carried out on your LAMP server:
Configure Your Server
Main steps include:
- Create a directory for the Omeka files in your server’s folder called:
public_html - Create a new database in the SQL server
- Create a new database user and password
- Assign that user to the new database
Create a Directory for Omeka S on Your Server
There are various ways that you can do this. You can use the file manager tool within cPanel, you can use ssh and mkdir, or you can create a new directory using FileZilla. Whatever option you choose, make sure that the directory is located in the server’s public_html directory. Keep in mind that the folder name you choose will shape the URLs for your repository, so choose something descriptive but also simple, like omeka or omekas.
In the above example, if your username was umsifan and your directory was omekas, your site’s URI would look like this:
http://umsifan.si676.si.umich.edu/omekas/
Create a New SQL Database on Your Server
There are various ways to do this, but for ease of use (and also because this is not a class about SQL), I suggest using the interactive Databases tool within cPanel.
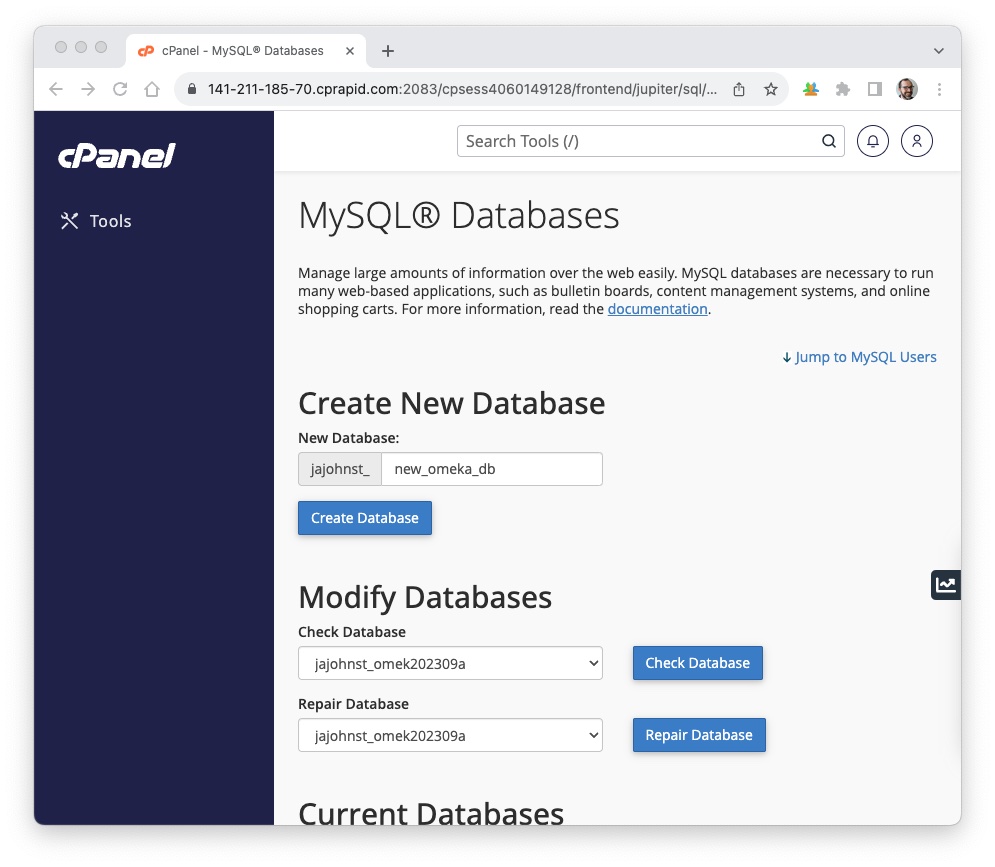
To do this, click on “MySQL Databases” under “Databases” in cPanel. In the databases tool, you will complete the form for “Create New Database,” which is where you should type the name of the database that you want, then click on “Create Database.” The name you choose will be appended to your username after an underscore, and in a sense is like a namespace, providing a unique alias for your database even though there are likely thousands of database tables out there named omeka. It will look something like this, if you wanted to create a new database named jajohnst_new_omeka_db:

Create a database User Agent (username and password)
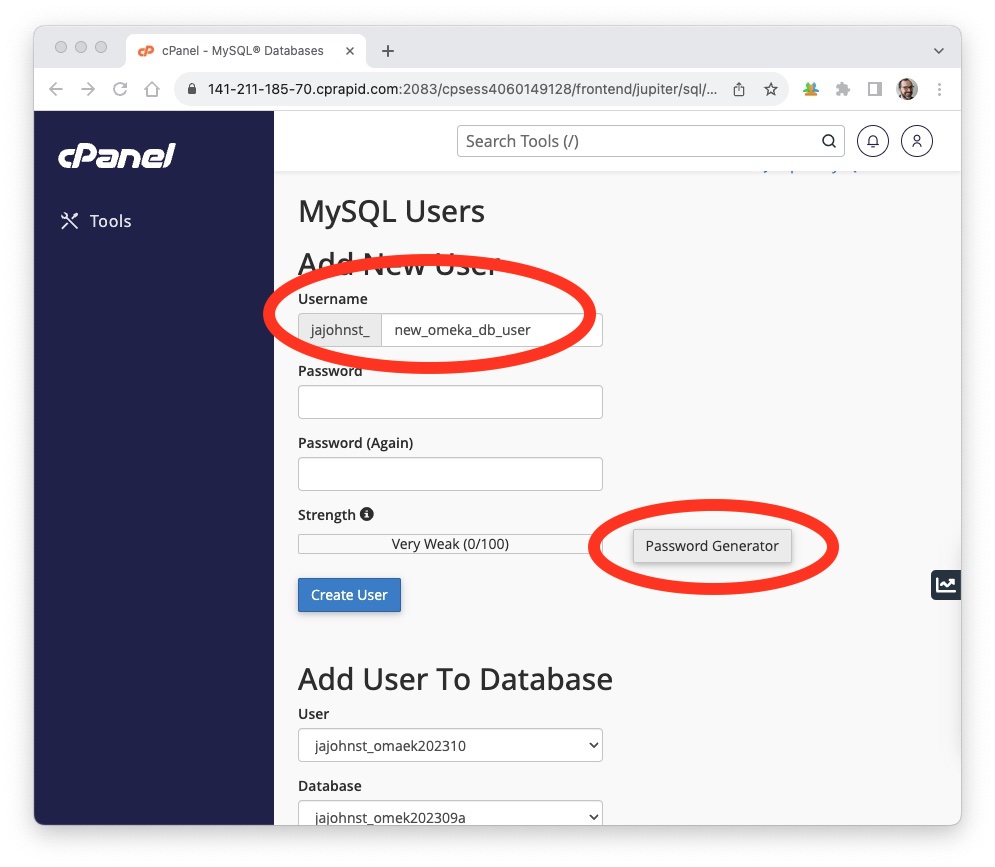
Scrolling down in the databases tool, create a username and password combination. You won’t need to use this frequently, but you will need to enter the pair in your .ini file, so make note of the username and password that you create. You are essentially creating credentials for a local “user agent,” which will interact with the databases on behalf of Omeka S. If you want to randomly generate a password, use the “Password Generator” button or try an online tool like https://www.avast.com/en-us/random-password-generator#mac. Remember when you create the password, write it down or copy it to a safe place before proceeding. You will need to reuse it later.

Assign the user to the database
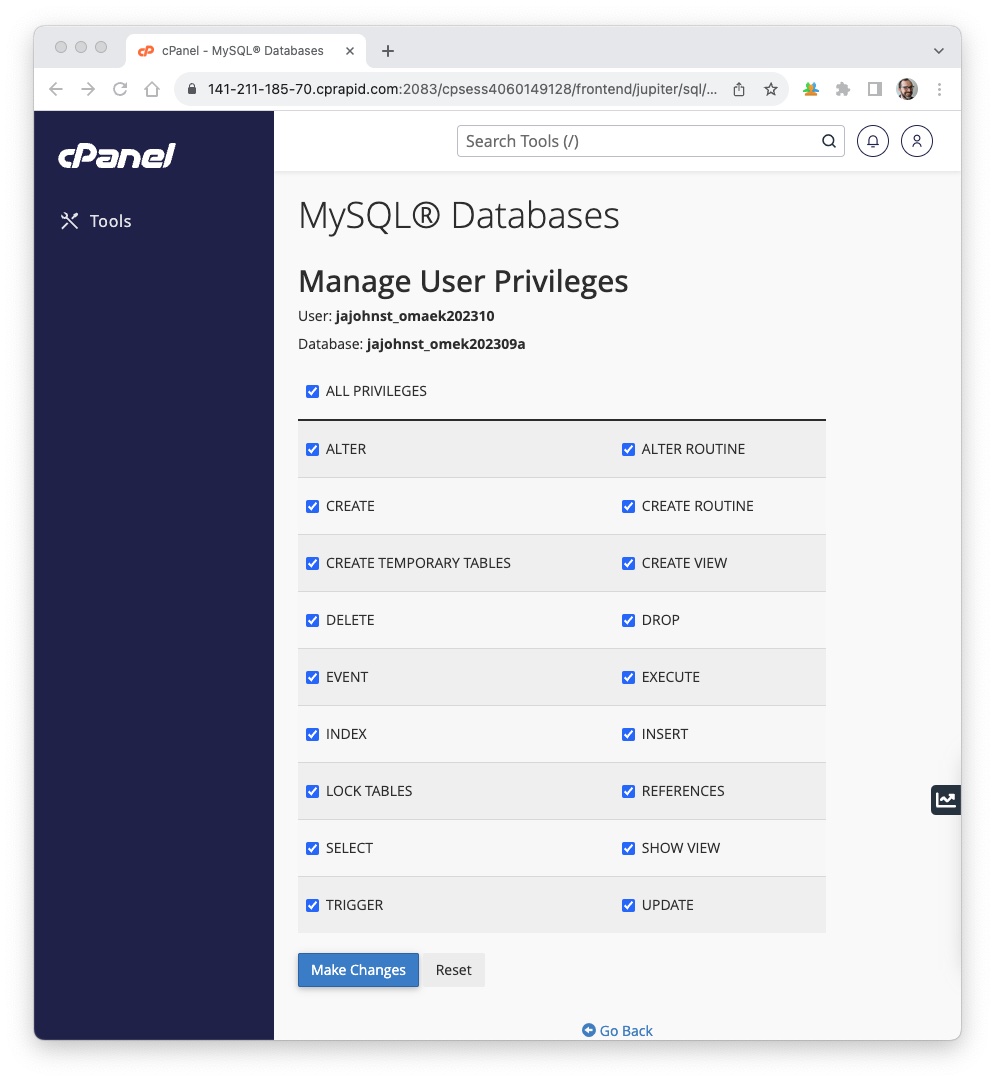
Finally, assign the user to the database. This makes use of the “Add User to Database” section of the database tools. Here, select the user you created, then select the database, and click “Add.” In the screen that follows, select all of the permissions (you want this user to be able to do all the things with the databases that Omeka S will need!):

Download Omeka S
Download the entire package of files for Omeka S from the Omeka website at: https://omeka.org/s/download/. This should arrive in a zip format. Unzip the files and take a look. It is interesting to look around the files and get an idea of how they are structured.
Notice, for example, there are a lot of .php files but not many .html files. Why do you think that is?
Prepare Omeka S files locally
After you’ve looked around, find the file database.ini in the folder config. This file contains the information that allows the Omeka files to talk to the SQL database. It has to have a user, a password, a database name, and a host name. This information will be used by the PHP files in Omeka to write new information to the database, create, read, update, delete, or whatever else it may need to do to access information in the database.
You can open this file as a plain text file using VSCode, or any other text editor. When you open the file, it should look like this:

Enter the information from the database that you previously created on the server. This will vary based on the names that you chose, the host name should always be “localhost”. Thus, the information should look something like this, if your user was omekas_db123:
user     = "omekas_db123"
password = "secret123"
dbname   = "omekas_db123"
host     = "localhost"
Once you have the information entered, make sure you save the file.
Transfer Omeka S files to your server
Once the file is saved, use FileZilla to transfer all of the files and the directory tree to the server in the destination directory that you created in the first server setup step. In the case of your first install, that was suggested to be omeka or omekas.
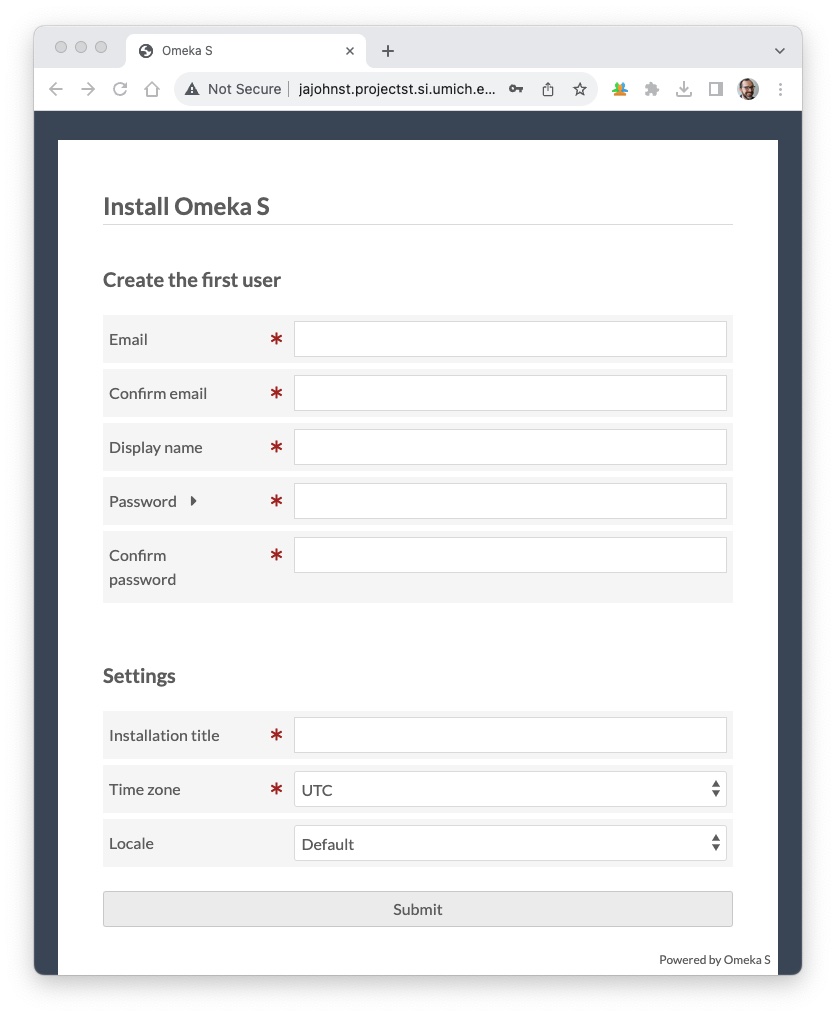
After the file transfer process is complete, you should be able to navigate in the browser to your server’s URL, and then add the name of the Omeka S directory at the end to display the Omeka S interface. It will look something like this:

Omeka S is Ready to Go
If you are seeing a page like the one above, then your Omeka S instance should be ready to go. To get started, fill in the initial user form and click the “Submit” button at the bottom of the page.
The final steps are to configure Omeka S with new sites, modules, users, and the collection content. To get started on that, the next step is Omeka S configuration.
Resources
- [Related slide deck illustrating the Omeka S install process][related-slide-deck]
- Guide to logging in to your server
[related-slide-deck]: