Installing Siegfried (1.11.4) on Windows (11)
Siegfried is a tool that you can use to characterize files, which means that it will assist in creating information about the kinds of files in a given location, their fixity, and other basic preservation information. You can also use it to link file type characterizations to the major file type registries, including the PUID (PRONOM Unique Identifier), FDD (Library of Congress Format Description Documents), and MIME Types (Multipurpose Internet Media Extensions, sometimes called Media Types). The goal of this activity is to create shared, reliable, and documented file format designations, when possible, so that you know what kind of stored digital information your collection has in it.
The tool is available at https://www.itforarchivists.com/siegfried/. The tool was developed and is maintained by by Richard LeHane, who has posted instructions at that link about how to install the tool. The instructions on this page augment those and aim to provide a step-by-step guide to getting started with Siegfried, specificallys in a Windows environment.
Installation Step by Step#
- You can download the files from the above website, or directly as a zipped file at this link (v. 1.11.4, as of January 2026).
- You need to designate a place on your computer to keep the unzipped files. These should be somewhere in your system directories. I tested the following option:
- Create a folder near your root directory called “utils”, which creates this path:
C:\utils; within that, create a folder called “siegfried”, which creates this path:C:\utils\siegfried.- You can create this directory by: open a File Explorer window. Access the file path bar by typing
Alt + D; in the file path bar, type “C:".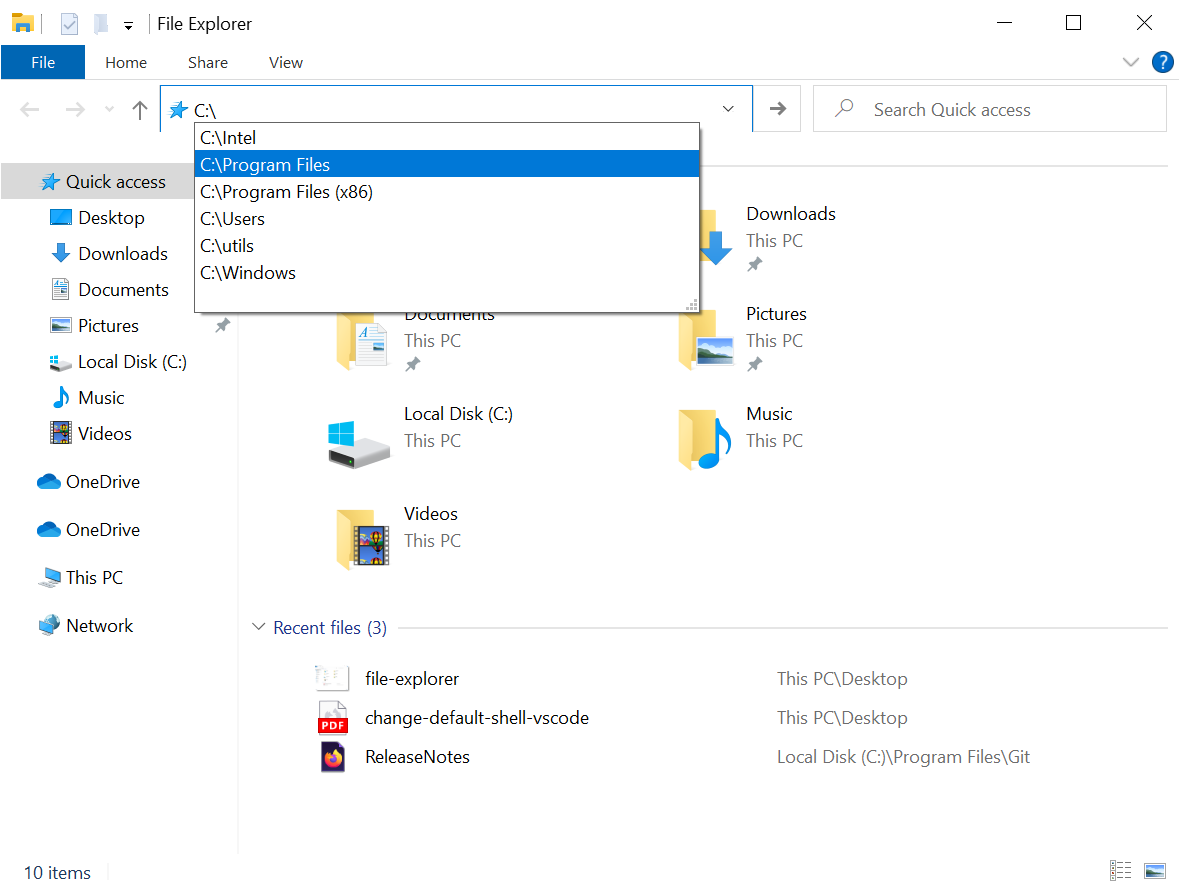
- Create a new directory by typing
Ctrl + Shift + N, and type the name “utils”.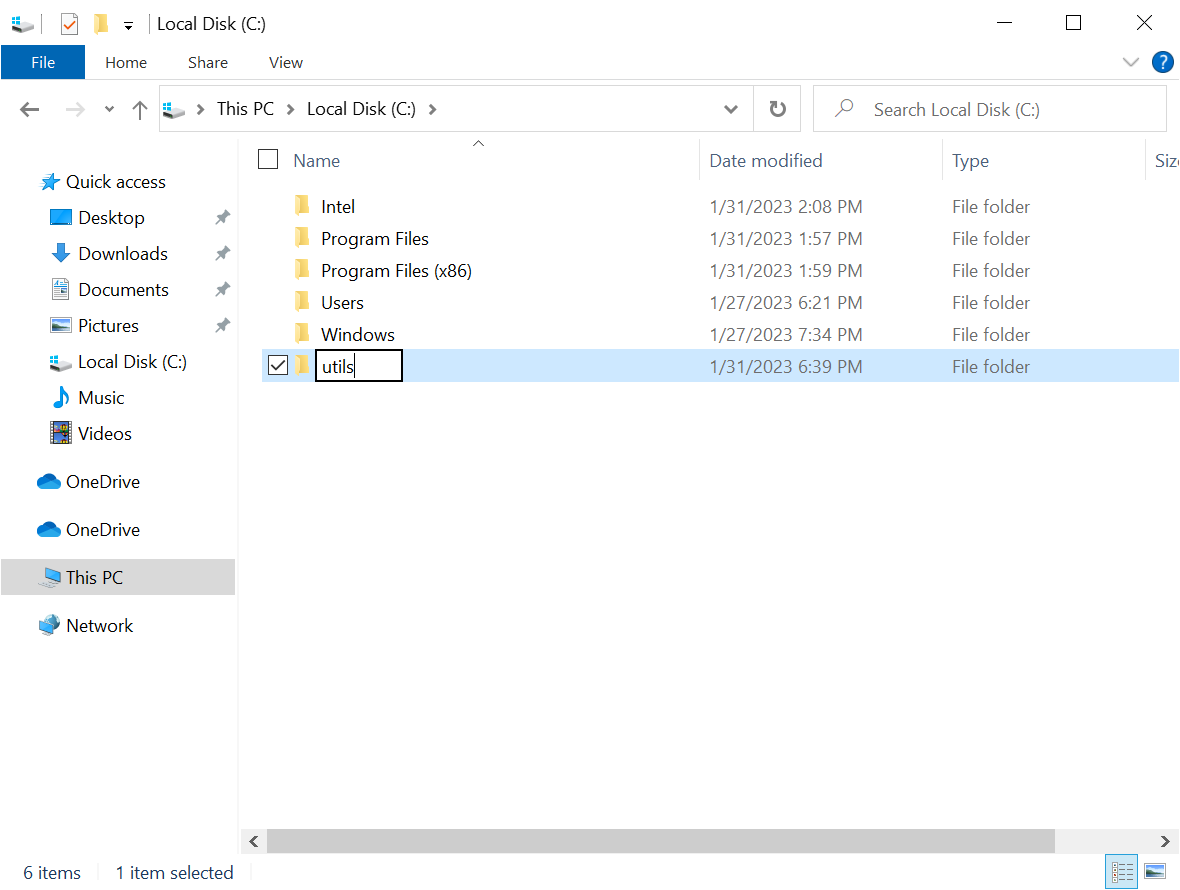
- You can create this directory by: open a File Explorer window. Access the file path bar by typing
- Create a folder near your root directory called “utils”, which creates this path:
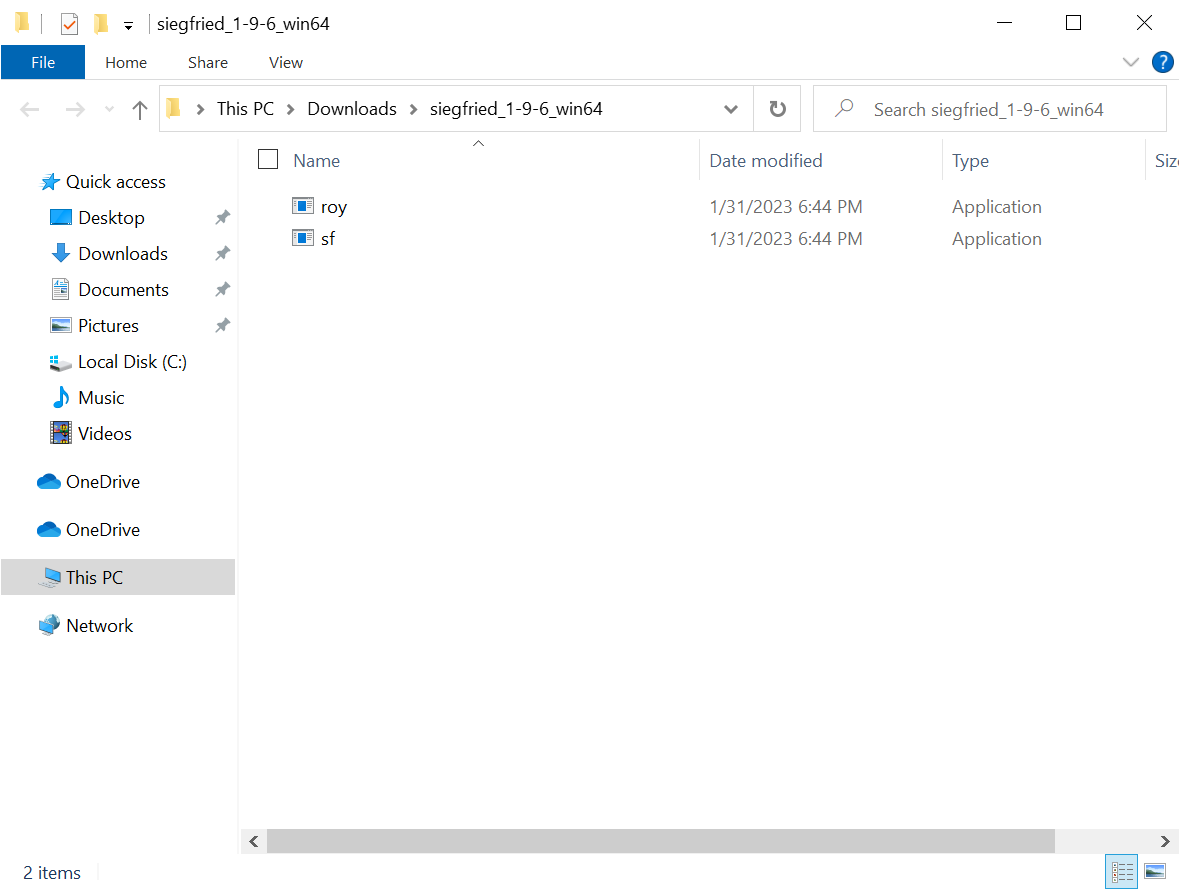
- Once you have the destination folder ready, unzip the file you downloaded in step 1. (Do this by right clicking on the zip file in the location where it was downloaded, then click the “Extract All…” option.) A window appears that offers you to choose where the files will be extracted (unzipped); choose the default, which should be the current location. Open the unzipped folder. You should see two files: sf & roy (that you, siegfried & roy? 🤷).
- Move both of these files to the directory you created in step 2. That is, now both files should be visible at the path C:\utils . Like this:
- Final (multiphase) step. Now you need to ensure that the “utils” folder is visible to your system file path. (This step is outlined similarly here.)
- Go to the Power User Task Menu by typing the
Windows key + X. - In the Power User Task Menu, select the “System” option.
- Select “Advanced system settings” (under the “Related settings” heading).
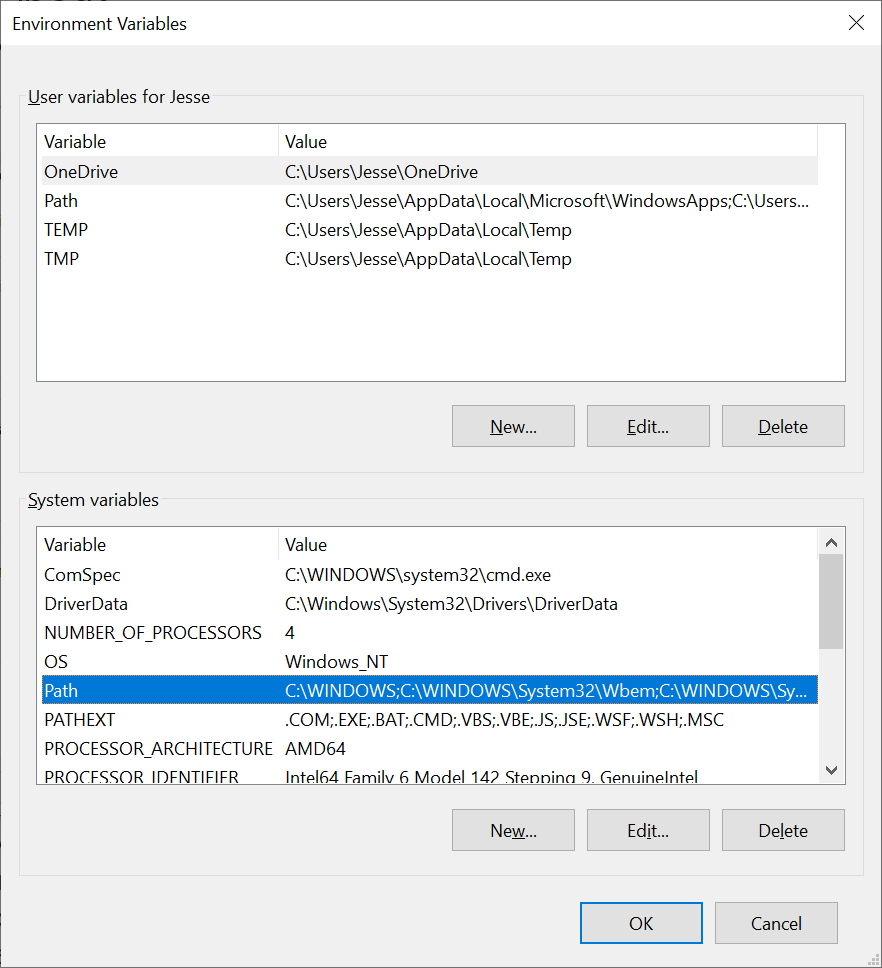
- In the window that opens, select the button that says “Environmental variables…”
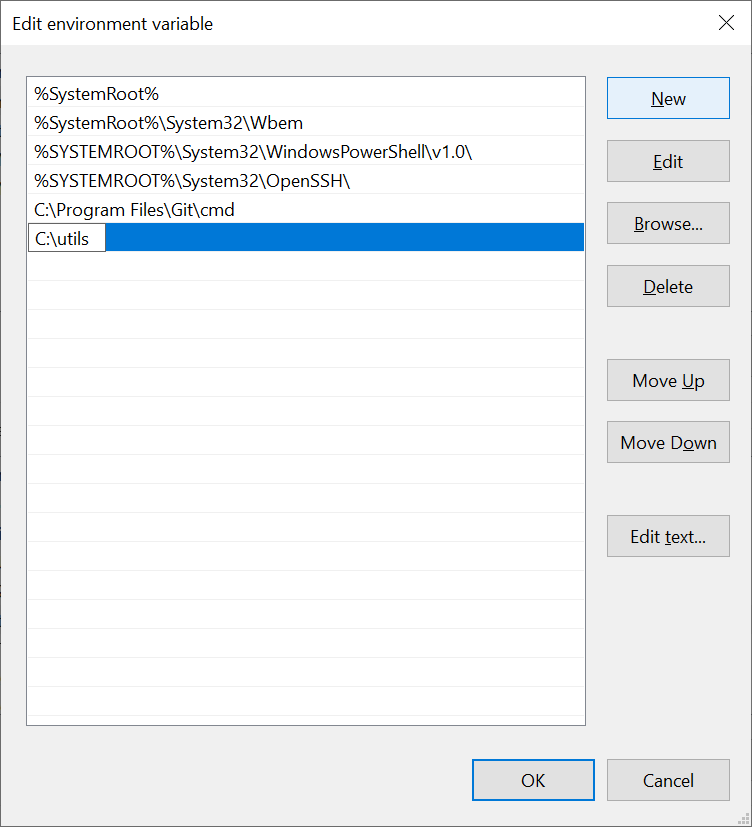
- (Almost there!) In the window that opens, look for the “System variables” box, select the line that says Path (or double click so it is highlighted), then select the button that says “New…” underneath that box.

- In the (final!) window that appears, select the button that says “New”. Type your “utils” path into the box that opens with a cursor: it should say something like C:\utils & look like:
- Go to the Power User Task Menu by typing the
- Okay, now the real final step: restart.
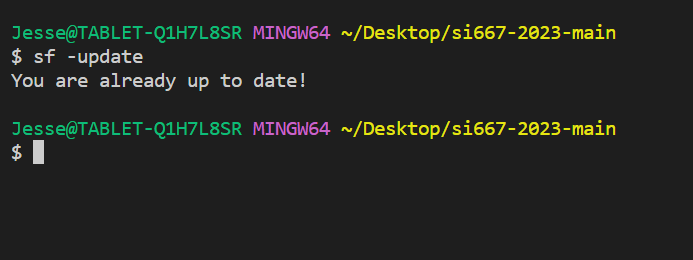
- When you get back online, open a terminal window in VSCode. You should run the command sf -update & receive a sort of confirmation message.

- If that doesn’t work, try running siegfried with the full path; in the Visual Studio Code bash terminal, for example if you moved the files to a folder named “siegfried” within the “utils” folder, run: /c/utils/siegfried/sf.exe -update
- If you see “You are already up to date!” it’s working!
- If you don’t see anything, or get an error message, don’t worry. We’ll have to take a closer look.
- When you get back online, open a terminal window in VSCode. You should run the command sf -update & receive a sort of confirmation message.